Thursday, September 26, 2013

Kitty Crafts

I may or may not have mentioned this yet, but we have a new addition to our family this year:


Don't let that adorable face fool you...this furball is a complete brat! But he is our little brat and we love him. We adopted him from the local animal shelter several months ago; he had been picked up as a stray (but was obviously someone's pet since he still had rubber caps on his claws), and had been there almost 3 weeks when we met him.

It was definitely a rough transition there for a while...at a year old, he came with a few bad habits that we've been working to break. The first made it obvious why his previous owners had capped his claws - he loves to scratch everything. Correction: he loved to scratch everything but the kitty scratchers I bought for him. His favorites were the couch (which he claimed as his in the first 5 minutes of being brought home), and the upholstered seats on our bar-height dining room chairs.


Since he's one of the longer cats I've known, I thought a nice tall cat scratcher was in order...until I saw the prices! I knew I could make one just as good for less with some hot glue, rope, and some kind of stand. A quick trip to Lowe's led me to the carpet section, where they sweetly gave me one of the huge cardboard tubes for free, along with some carpet scraps they used to make samples. I had the lidded wine box at home already - Total Wine sells them for $5 and I had purchased all they had with the intention of making shelves, but they turned out to be better for kitty uses than my own! I just attached a section of the tube (fair warning, it takes a long time to cut even with a saw) with some leftover corner brackets from my pantry project. I covered the top of the box (and brackets) with carpet using hot glue, and used hot glue again to start securing the rope for wrapping, and glued it every few rows along the way. I capped the end with a plastic lid from a round container and continued the rope all the way up over until it was finished! I estimate the whole thing cost around $15, and after about a week of patience, gentle corrections, and lots of treats, it's his favorite thing in the house to scratch.

The claw caps are still a must, and we get them online here for about half the price of pet stores.


Some of the other wine crates I had were a bit bigger and made nice beds. I lined this one with a floppy crocheted basket I made ages ago:


This one got a fabric liner, and was apparently tasty:

So if you wonder what I'm doing on any given day...the answer is usually tormenting this furball with snuggles.
More to come, Yellow.

Wednesday, September 18, 2013

Halloween Craft.

My favorite time of the year is Halloween and It's still September but I wanted to share a really cute idea that you could try with the little mini pumpkins. I found some plastic vampire teeth at Walmart for 99 cents and 6 mini pumpkins for $2.29. I had some candy crafts in the pantry from last year so I'll use the eyes for this craft.
Cut a hole in the pumpkin and spoon out the inside.
Place teeth inside and use cake decorating paste to put the eyes on the pumpkins.
This is a fun craft and it takes no time at all to make these cute little guys. I hope this inspires you to do some fun crafts with your children this Halloween. Zabrina.

Tuesday, September 17, 2013

Canning The Easy Way.


After a friend from college mentioned to me on Facebook that she wished she knew something about canning, I figured it was time to add canning to our blog! I taught my children years ago everything they needed to know about canning so that they could share canning with their children.


Pickling is not the same as canning in that all you need is a water bath. Today's blog will talk about pickling and I'll show you how easy and fun canning can be. Canning pickles is considered a high acid process of canning so a water bath is fine and healthy for canning.


You will need Jars. I use pint sized ones, but this is really up to you. You will need:
Cucumbers and peppers
fresh garlic
fresh dill and
1/8 cup dried dill
(fresh) Black pepper
(whole) mustard seeds
fennel seeds
pickling solution (I use Mrs Wages) You can use your own acid from the store as well.
Vinegar
and water

The first thing I tell everyone when teaching canning of any kind, be it jelly, jams or green beans. Super CLEAN your kitchen. I mean it. CLEAN your kitchen and make sure that everything is wiped down with an antibacterial cleaner. While you are cleaning you kitchen and clearing space for canning, put your jars in the dishwasher. Yes, take them out of the box and put them through a fast wash in your dishwasher. I put my lids in a pan so I can boil them on the stove.

next step is clean your cucumbers and peppers like i did in the picture. Washing all your fruits and veggitables before canning is really important. I use a manoline slicer to cut my cucumbers but you can use a knife. I leave my peppers whole.
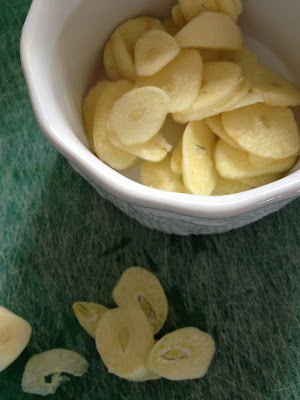
Next I need to get the garlic ready. This takes time getting the skins off and then taking the time to thin slice for pickles. I use a whole garlic clove for my peppers.
Then I divide the fresh dill into pieces for there is some for every jar of pickle ( 12 ) jars.
In a bowl I add my dry mix of 1/8 cup pepper corn seeds, mustard seeds, dry dill, fennel seeds and mix it together. I add 1 tsp of this seed mixture to each jar before adding my pickle slices.
I know it looks like a lot but you'll use it all. This is when I pull out one of my little crafting tables to help me in my kitchen with add space. I use baking sheets with paper towels and place my washed jars on the baking sheets so I can work with an assembly line system. Dry mix in jars, shove in sliced cucummbers or peppers, add garlic, fresh dill.
Put a large pot of water to boil on the stove Your water ball will need a huge pot. If you don"t have one, you can always try Goodwill or a second hand store. Add water to your pan of lids so you can start getting those lids clean and hot.
In another large pot add 7 1/3 Cups of water and 3 1/3 Cups of vinegar on high heat. Add Mrs Wages Dill Pickle mix and cook until all is dissolves. Pour pickling mixture into your jars, remove Lid pan from heat and place your lids on your jars.Making sure they are on tight, place your jars into your water bath at a boil for 10 miniutes.
After 10 mins remove and add more jars until done. Let stand on your counter until cool. These will be ready to eat in two weeks.
here are some other pictures of canning Fig Jam, and green beans.


Canning low acid vegetables like green beans requires a pressure cooker. Now, back in the day, my mother canned green beans without a pressure cooker, which is fine still if you cook your green beans completely before you can them. Now days though everyone uses a pressure cooking system which is recommended for health reason. Now that being said, I don't use a pressure cooking system.


I hope this post inspires you to take up canning in your kitchen. My husband loves to give away my canned pickles and peppers as Christmas gifts, which I think is funny. Enjoy.